|
I brushed on a good coat of
30 minute laminating epoxy to seal the table. Water ruins MDF by
making it swell. When it dries the edges stay swelled and the board is usually warped or bowed.
Again, I want this to be the last table I ever build so I wanted it done right.
There are MDF boards you can buy that have a solvent-resistant white coating. I'm not sure what it's called
but I think it's melamine. I've used them as pallets for screen printing presses and I've seen the boards at some home improvement stores.
The edges of these boards won't be sealed so I recommend you coat any exposed areas. |
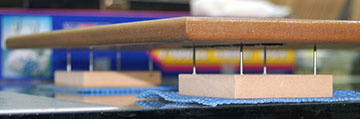 |
I came across a tip on a woodworking site that said to prevent table tops from warping you should
coat both sides at the same time. Coat the bottom then flip it over and place it on a board having nails
driven through it. Now coat the top. The nail marks are surprisingly difficult to see
— particularly if
you apply more than one coat because the nail marks will be in a different location with each coat. in this
case I didn't care how the bottom looked as long as it was coated. |
 |
I mixed 2 ounces of Klass Kote white base (not the same as their white paint) with about one teaspoon
of medium green to create a light pastel green. I built up a heavy coat by spraying several light coats on
each the top and bottom of the table. I sprayed the bottom first and then flipped it over and sprayed the top.
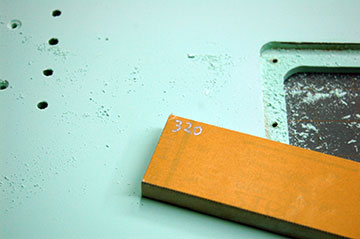
A day later when the paint was cured I
block sanded it using 360 then 400 grit
sandpaper. This is one of the things I
love about Klass Kote. It creates a fine powder when you sand it instead of melting, turning gummy and
clogging your sandpaper.
I always keep my shop vac nearby with a brush attachment and vacuum what I'm sanding and the block frequently to
remove dust so that I'm sanding what I'm sanding instead of sanding dust. If that doesn't make any sense at
all don't
worry about it. |
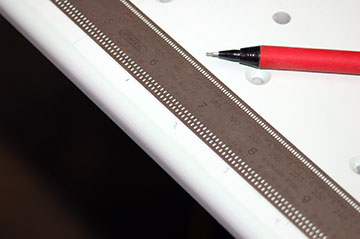 |
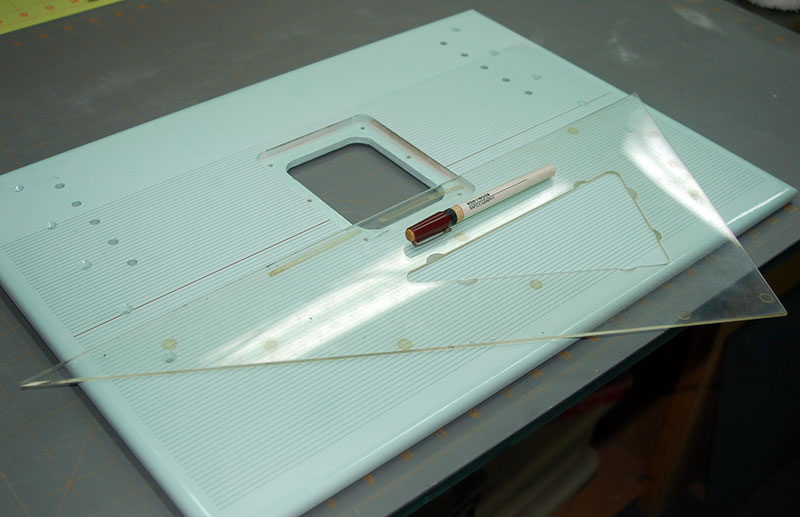
Next I used an etched rule to mark off rules on the table spaced 1/8". I put a zero-opening
collet in the Dremel and mounted it. The center of the collet was used to locate the first centerline.
All other lines were measured from this centerline. |
 |
The rules were drawn using a .035 drafting pen and straightedge. The rules aren't necessary and
are very tedious to draw but they provide a reference point. The ink was given a couple days to harden and
then I sprayed several light coats of satin clear Klass Kote epoxy to seal them. I topped it off with a good
coat of auto wax. The top should be as slick as possible so the only resistance you feel is that of the bit
cutting the work. If there is too much friction from the work sliding over the table it will be difficult to
gauge if your feed rate is correct to prevent burning the wood while getting a clean cut.
At the same time you don't want the table too glossy because reflective surfaces make it more difficult to see
what you're doing.
The table is well-sealed so I can use any normal household cleaner on it such as soapy water, window
cleaner, 409, etc. |
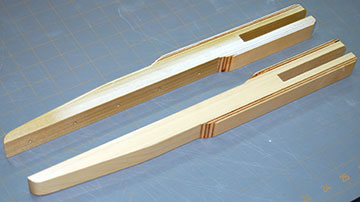 |
The extensions were a little spongy even when clamped to the table so I added some additional support
(1/4" aircraft ply) to top and bottom of the extensions. |
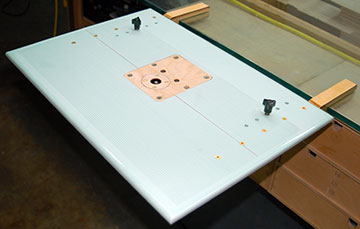 |
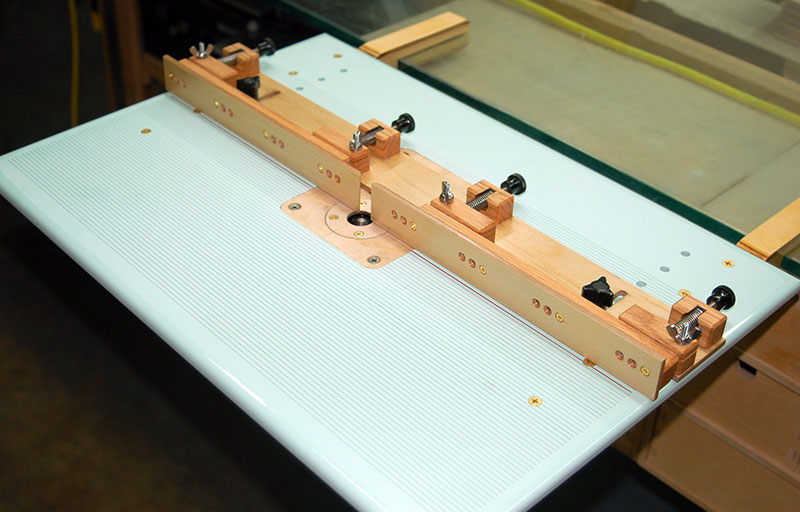
The extensions are attached using five #8 x 1-1/4" brass wood screws. The two black knobs shown
attach the fence and thread into the blind nuts inset in the underside of the table.
A small variety of knobs with a stud or a female thread are available at home improvement stores.
I used knobs having a 10-24 thread. Fewer threads are better because they thread on and off faster. |
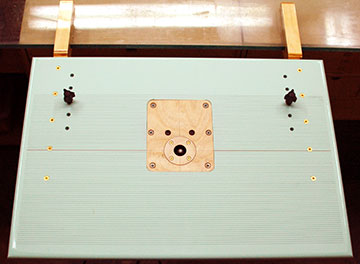 |
Another view of the completed table. The whole works slides on and off my bench in a second or
two. |
 |
My fabulous new router table having my new awesomely awesome
split fence attached. I can use the table as
shown when doing light duty tasks but the table extensions are a little springy unless they're clamped. That
hasn't bothered me or caused any problems but a couple C-clamps eliminates the springiness. The whole table is
very compact. It's about 3" tall with the Dremel removed. With a hole drilled near the end of each
extension the table can be hung on the wall. Although it's not an afternoon project if you make a lasting router
table it's a tool you'll really enjoy using if you take the time to make it reasonably well. It's been a real
time-saver for me and the answer to a lot of problems that I'm not sure how I would have solved otherwise. |