Airfield Models - How To

The Bevel Master of Fortune

December 19, 2021


Home
About
What's New
History
Models Gallery
Model Building Safety
Articles
Mail & FAQ
Site Map
Site Feedback
Contact
Add to Favorites
Comments
Search Airfield Models

Back to How-To Articles


Airfield Models (http://www.airfieldmodels.com/)Make the Mighty Disk Sander Bevel Master

Make the Mighty Disc Sander Bevel MasterI have decided I like bevels a lot.  For many, many years my default practice was to round over edges, ends and corners.  It was just the right thing to do in all circumstances.  Sometimes the round was very slight because I actually needed a sharp corner but wanted to remove the wood fuzz.  Other times there is a large round-over so that when I trip over something on the floor and quickly react to break my fall into the coffee table with my face it hurts less.

Years from now when intellectual art enthusiasts are discussing my master works they will have a name for that era of my life.  They will call it "Paul's Age of Environment Softening to Continue Survival".  Of course the discussions will be heated and possibly lethal.

I can't predict what conclusions our descendents will draw but obviously they will center around the profound impact my creations had on artist model-builders, the very significant collateral influence on art of all genres as well as the healing of deep wounds to the souls of those who have lived tortured lives of hardship.

The knowledge of the beautiful light my work will shine unto this, our world, of course, humbles me.  I think I might cry.

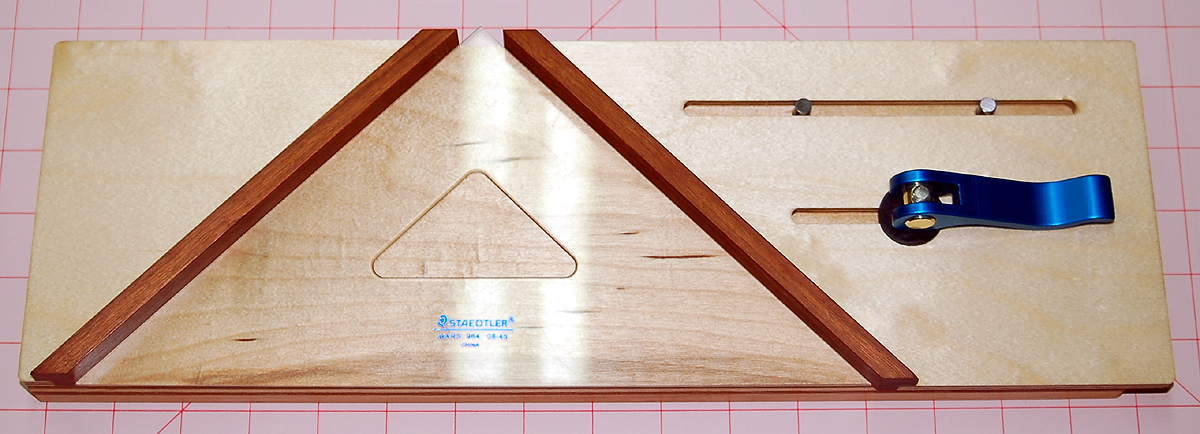
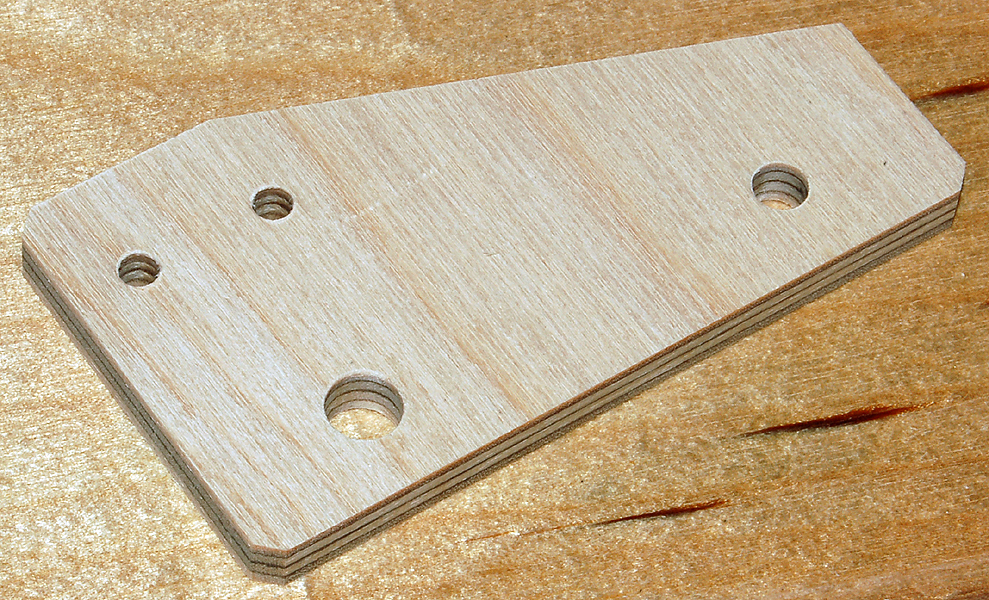
I am now living what likely be known to the future enlightened as the "Age of Bevels".  While I have beveled corners sporadically through the years it become a way of life sometime in 2009 or 2010.  Store those important dates away because they will be the source of many arguments in years to come.

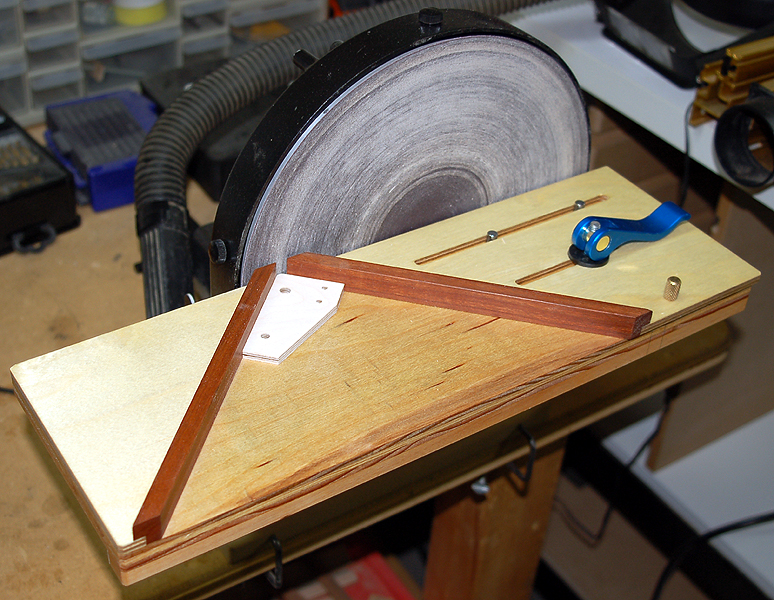
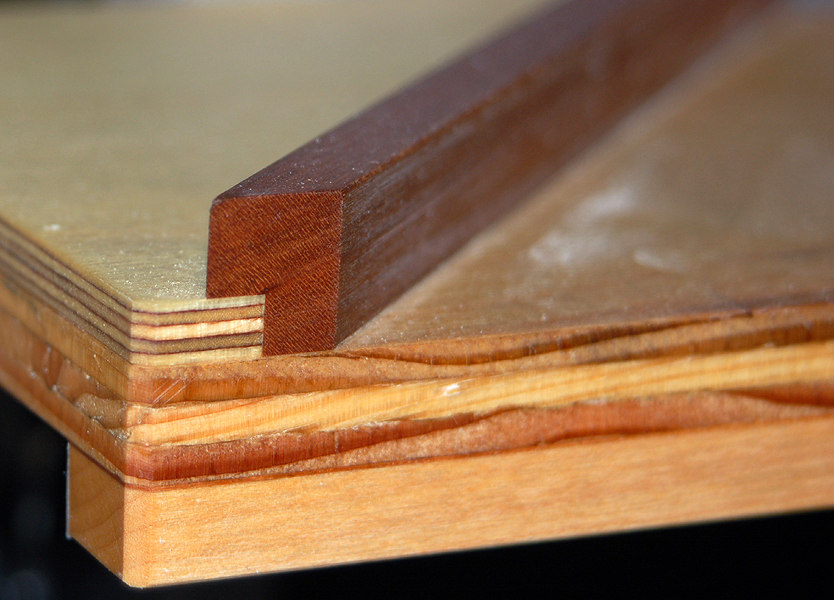
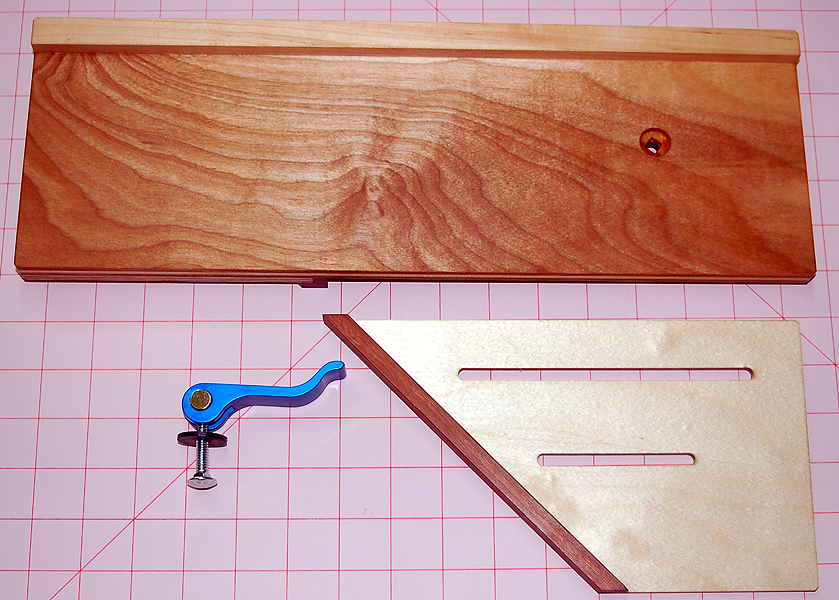
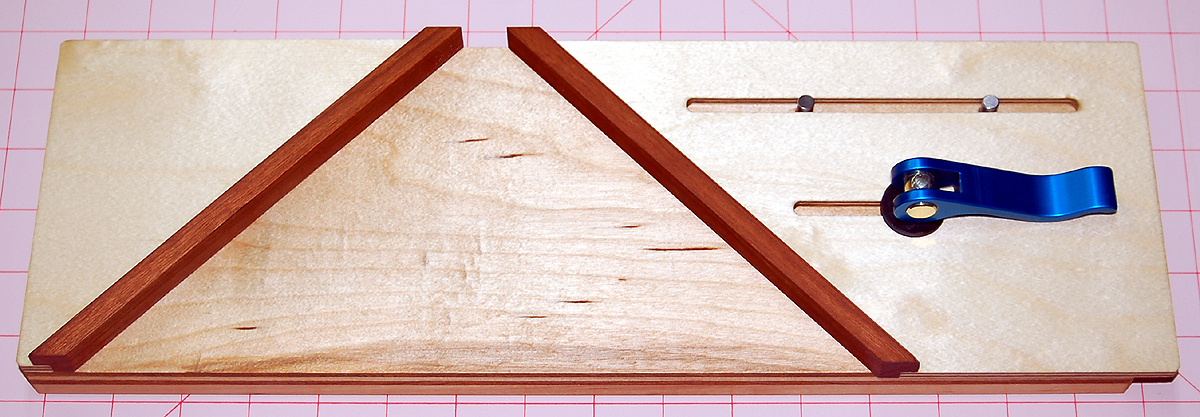
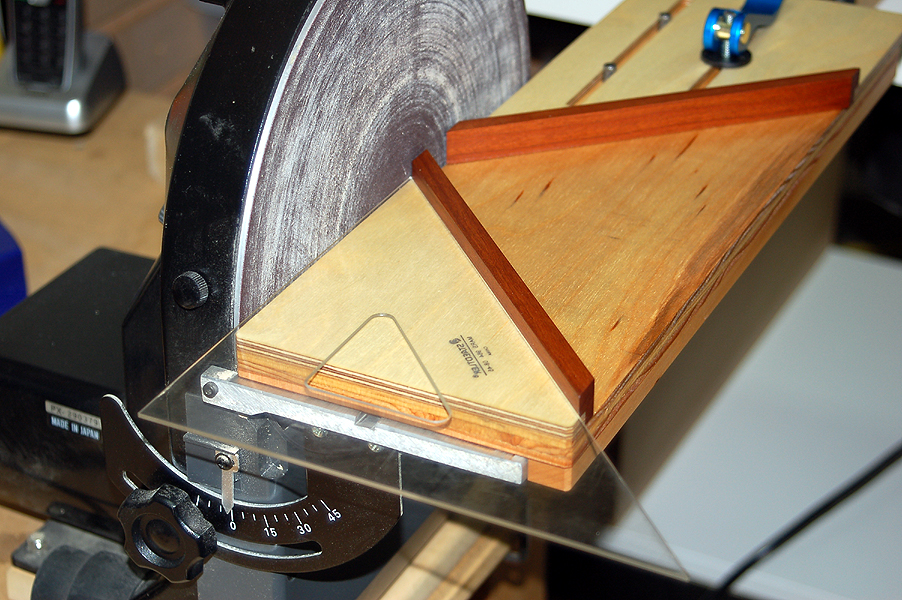
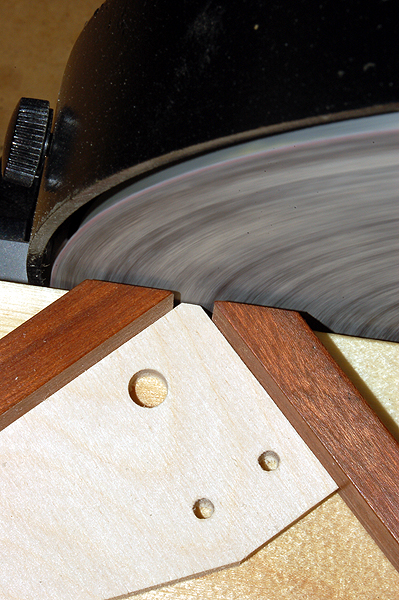
What these people won't know is one of my deepest, most embarrassing secrets; using hand-tools I could not produce a consistent, matching set of bevels on a a flat board in less than a handful of attempts.  My supreme greatness has limits.  No, really.

Again, that's a secret so please keep it to yourself.  We want future society to focus on the supreme greatness part, not the embarrassingly inept part.


Making the Bevel Master

This is another of my shop-made tools that is simple enough that my lack of foresight should not hinder its duplication.  In other words, I didn't take photos as I was making the parts and I don't have drawings or measurements for you.  I made mine so that the part being sanded can be pushed past the outer edge of the disk while still having a good portion of the base on the sander table.  Mine is 16" wide and used with the 10" Microlux disk sander.

I considered making this jig more flexible by allowing both fences to rotate such that bevels could be sanded to a variety of angles.  But I don't have a use for something like that at this point and it would have made the whole thing more complicated, harder to set up and more difficult to match previously used settings.

That is important to me because I use it to sand bevels on the fixtures I sell.  I want the bevels sanded on fixtures I make this month to match the bevels sanded on fixtures I made three months ago.

The most important thing is getting the angles right.  I used a good 45°-45° drafting triangle to ensure the fences were glued on accurately.  The photos showing the triangle were taken after the fact.  When I actually glued on the fences I removed the sandpaper disk from the machine.  Removing the sandpaper destroys it so I didn't do it again just for the photo but if you choose to make this tool you should remove the paper for better accuracy.

The base is 1/2" birch cabinet plywood.  Both fence bases are 1/4" aircraft plywood.  The fences are cherry.  I cut a whole bunch of cherry sticks for a project that didn't come to fruition so you will be seeing cherry pieces on a lot of stuff in the future.  I have $80.00 worth of it cut into approximately 3/8" x 5/8" by varying lengths up to 16" or 18".  The lesson there is to test your prototypes extensively before cutting up all your wood to make parts that aren't used.  (Does anyone know if cherry smoke makes steaks taste good?)

The lower fence that rides against the disk sander table is maple.  So.... ummm... yeah... I cut up a bunch of maple to the exact same size too.

Hardware consists of a 1/4"-20 Cam Clamp from Rockler.  I replaced the included 1/4" T-bolt with a 1/4" carriage bolt.  Two 1/2" long x 1/4" diameter steel dowel pins guide the adjustable fence with minimal play. The dowel holes are drilled undersize.  The pins were deburred on both ends then gently tapped in place with a soft-faced hammer.


The Bevel Master consists of two glued-up assemblies plus a couple pieces of hardware.  It is incredibly easy to make if you have a drill press, table saw and router table.  Hand tools work if you're much better with them than I am.

The fence to the left is permanently glued to the base.  I don't think it would be too difficult to modify this idea to have both fences rotate but it would be more complicated, more difficult to set up accurately and repeatability would be compromised.

Both fences have a square dado the width and depth of the aircraft plywood thickness.  I used 1/4" aircraft plywood which isn't actually 1/4".  The dadoes are the same as the actual plywood thickness.  The purpose was to have the piece being sanded against a single fence instead of a fence sitting on top of or in front of the base.  The dado allows for a much stronger glue joint.
The bottom of both pieces.  A hardwood fence is glued under the front edge of the base.  I set it up such that the base is very close to contacting the disk which allows better support of the piece being sanded and less fuzz on the bottom of that piece to be sanded away.

A hole is counter-bored for the carriage bolt using a 5/8" forstner drill bit.

When the tool was finally assembled I knocked out the carriage bolt, rotated it and pulled it back in until the cam locked in the direction I wanted as you'll see in the next photo.

The location of the two slots isn't real important.  I wanted the two steel pins to be a fair distance apart.  The slot is a slip fit over the pins which means there is a slight bit of play.  Placing the pins as far apart as possible means the play results in very little rotation of the adjustable fence — well under 1°.

The steel pin holes in the base were drilled on a drill press with a fence to ensure they are parallel to the long edges of the base.  The slot in the moving fence base was routed to match.

Ignore the fact that the tool is completely assembled and finished in this photo.  The right fence wasn't glued together or assembled to the base at this point during construction.

The left fence support was accurately cut to 45°.  The fence was glued to the support using slow-cure epoxy.  I masked all the exposed areas to keep the glue off.

When the fence assembly was fully cured I glued it to the base using the drafting triangle to ensure it was exactly 45° to the disk.  Again, when I actually did this the sandpaper was removed from the disk and the disk was cleaned with solvent.

Several spring clamps held it all together while the glue dried.

The two slots were cut on my router table using a 1/4" straight bit.  The cut was made a little at a time by raising the router about 3/64" with each cut.  I didn't actually measure how deep each cut was but it took about five passes which means I was cutting less than a 1/16" and more than 1/32".  I probably could have made the cut in two passes if I didn't care how much tear-out there was on top of the piece.

Now that the left fence is permanently glued in place I have to set up the right fence to be exactly 90° to the left fence.  I knew it would take several cuts to get it right so I left plenty of wood on the adjustable base.  If I recall correctly it took four adjustments on my table saw to nail it.

There are a lot of finishes I want to try just to learn about them and mentally file away what I learn for future projects.

Shop-made wood tools are perfect for this.  I care that my tools look nice and that they last.  Unfinished wood gets ugly pretty fast.  But the type of finish usually isn't that important.

By testing on things I actually use I can learn not just how to apply them properly and how they will look, but also how durable they are, what it takes to maintain them and if I'm inclined to do so I can set a frosty drink on it for a while to see if it leaves water rings that can't be removed.  That's kind of important for furniture you may build for your kitchen, dining area or deck.  I don't do any of that so I'm not putting a drink on my Bevel Master.  But I could if I wanted to unless somebody was there who cared enough to tackle, restrain and un-drink me.

Anyway.... I used Tried & True Linseed Oil and Beeswax.  It is incredibly easy to apply, takes about two weeks to harden, feels like a waxed finish all the time and is probably the most beautiful natural finish I've used to date.

The finish is almost a gel.  To finish the entire tool with two coats all I used was what was stuck to the inside of the lid.  In other words, a little goes a very long way.  This is expensive stuff so that's nice to know.  Just follow the very simple directions.  I got mine from Lee Valley Tools.

There are several versions of this finish.  I used the "Original Wood Finish".

I allowed the finish to harden over two weeks because I was in the middle of a fixture production run and wasn't anywhere close to sanding bevels.  When I got to that point I applied two good coats of furniture wax and then tested on some scrap wood.  It's a simple tool so I just wanted to make sure Murphy wasn't around.

In practice I lightly push the piece into the sander as I slide the Bevel Master.  You can see where I start near the center and then I slide all the way past the outer edge of the disk.

There is a fair bit of fuzz on the bottom side.  Mine is accurate enough that I can flip the piece over, repeat the sanding and the bevel is perfect with almost all the fuzz removed.  It's almost as easy to remove the fuzz by taking a couple swipes with fine paper loose in your hand.

For repeatability I drilled a hole through the moving fence base and into the permanent base for a pin.  Depending on what I might use this tool for in the future I may drill a couple lines of holes that are offset so I can have several repeatable settings.

Oooooh.... pretty bevel!

(Don't you love how the biggest cells have the least text?)

The three bevels on this piece are consistent and look professional.  I'm happy.


Previous —
Next —

Make a Dual-Axis, Height Adjustable Vacuum Holder
How to Make a Fenced Drill Table for a Compound Table

Comments about this article


Back to How-To's
Airfield Models Home


Copyright © 2011 Paul K. Johnson