![]()
|
|
|
|
|
|
|
|
|
|
|
|
|
|
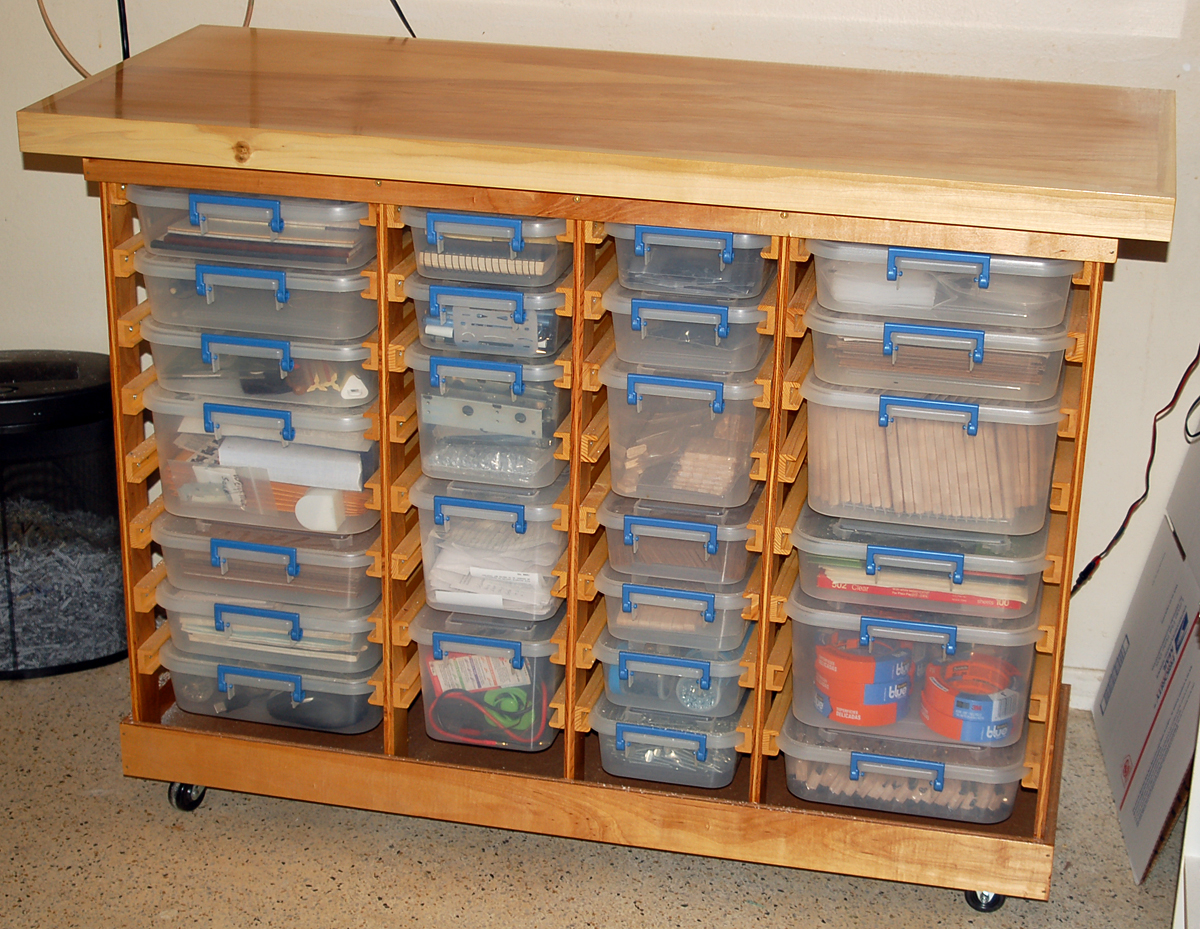
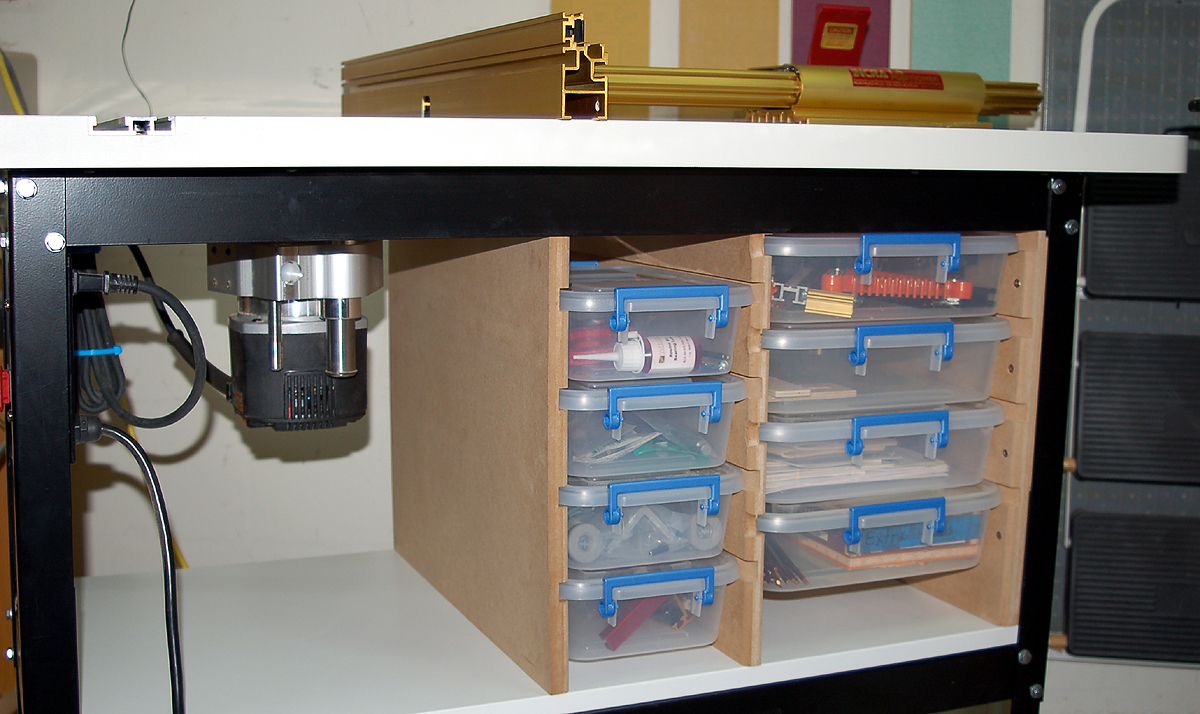
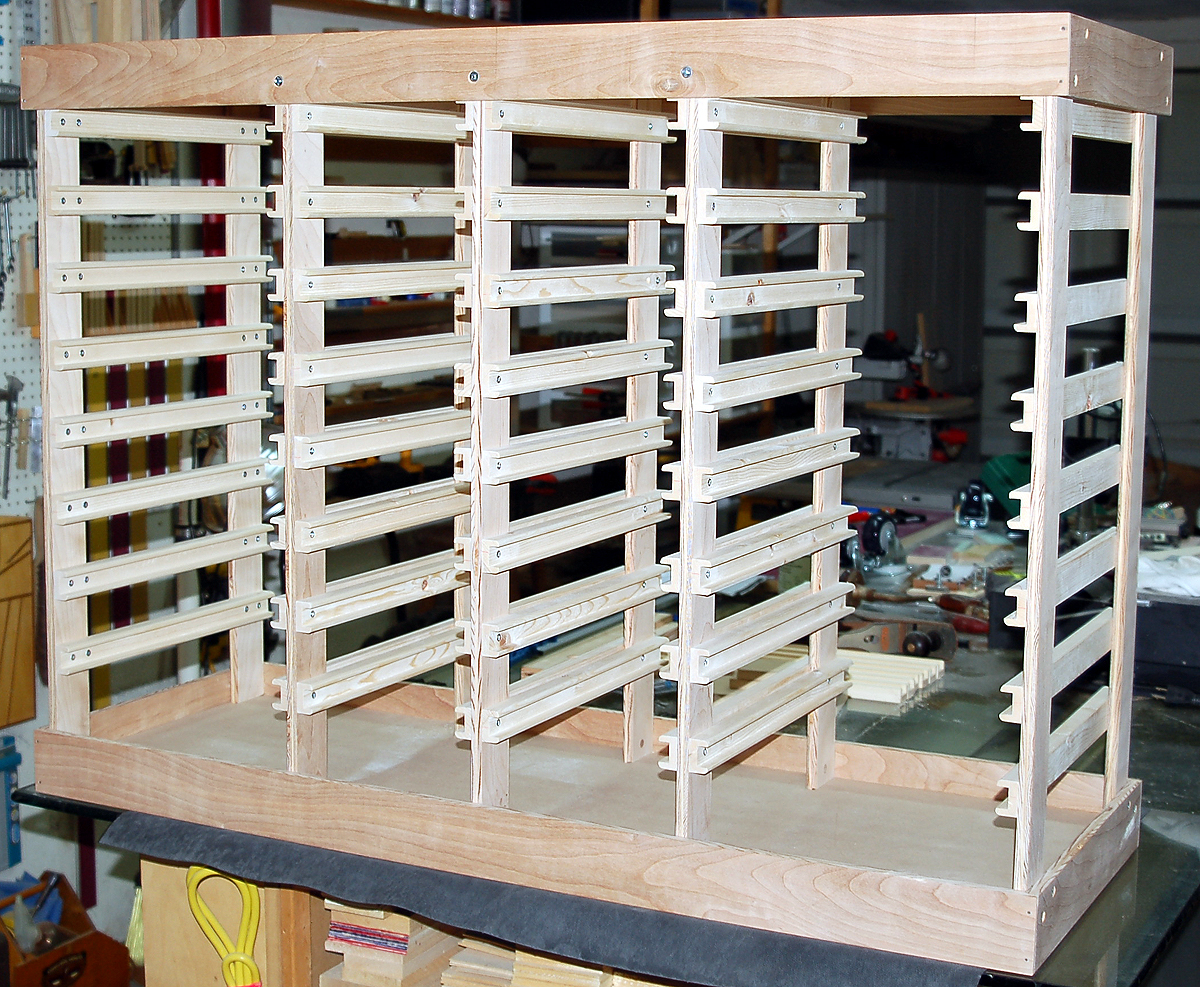
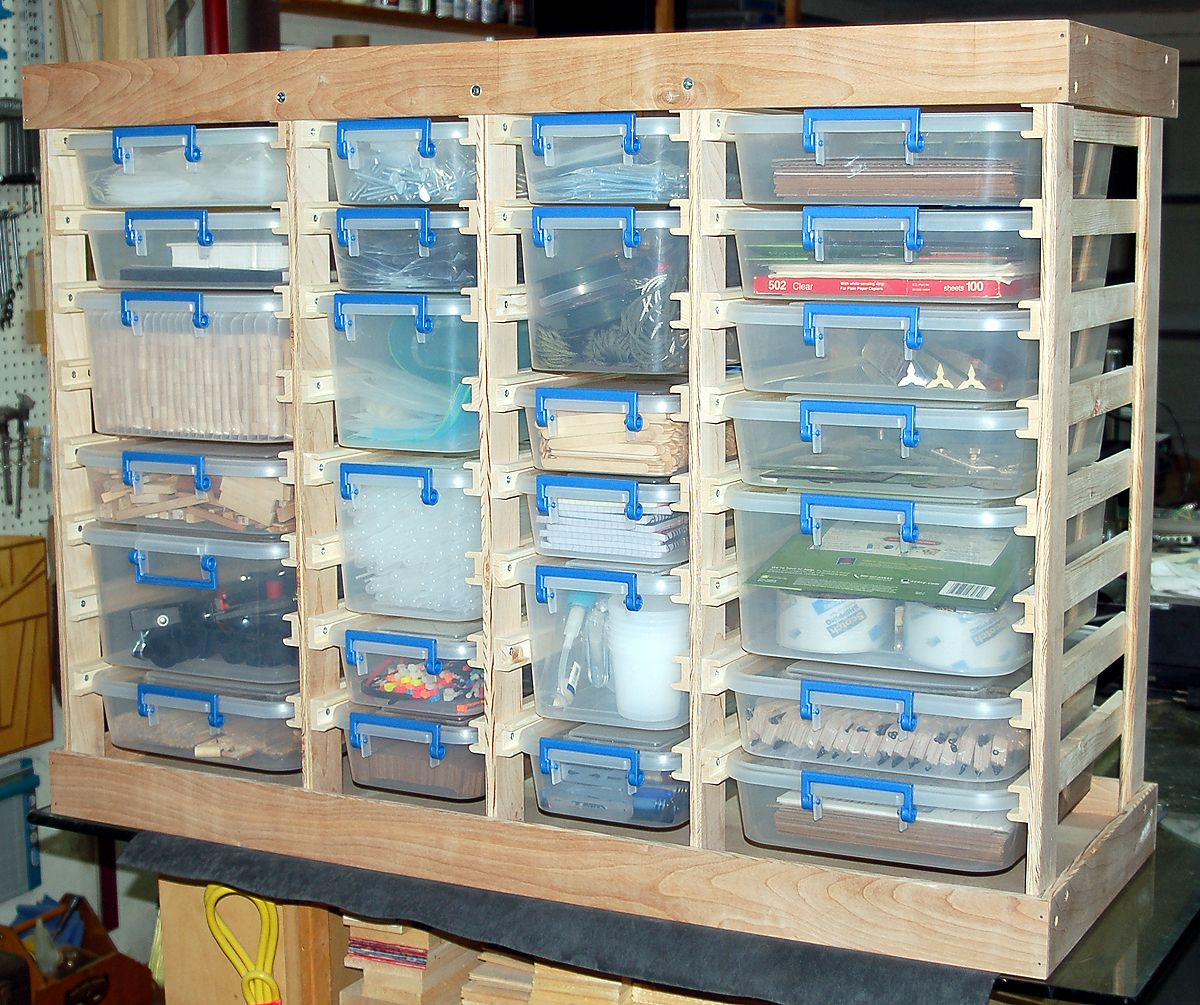
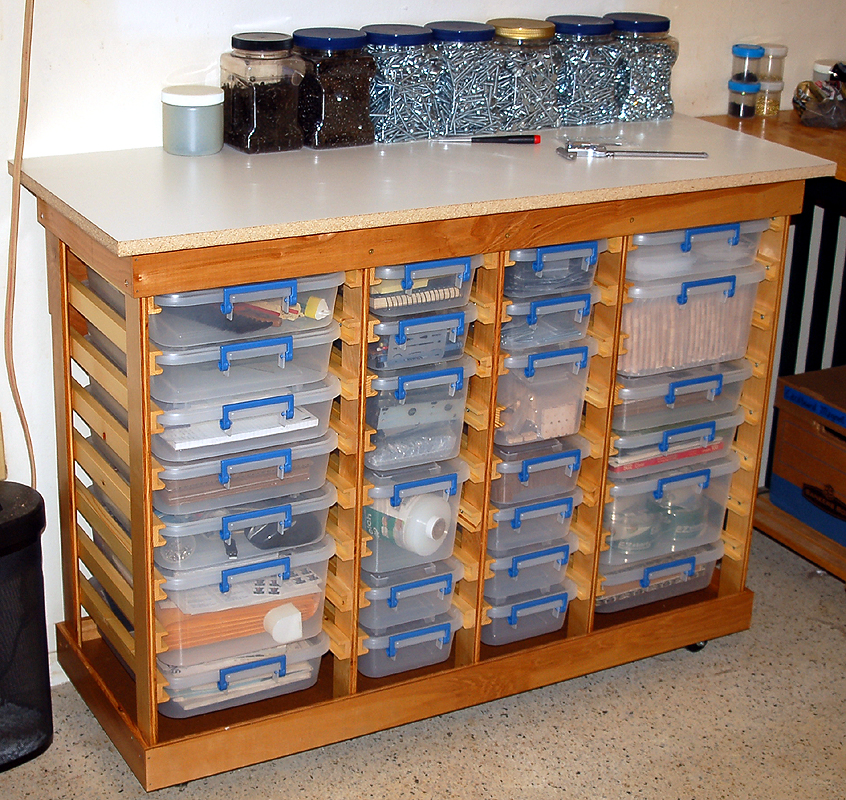
I have a problem. OK, I have a lot of problems but some of them aren't relevant to anything I'm going to talk about in this article and if you're lucky then I won't talk about them anywhere else on this site either. Anywhere I go in my home and shop every counter is completely covered with stuff. I don't have any work space at all. This is actually a very real problem and it is the reason I have not completed a model airplane for a very long time. In my quest for even more consolidation I discovered Sterilite storage bins at my local Walmart a while ago and bought a few. I decided I really like them so I bought a few more. In the shop I use them to store all kinds of items such as wrenches and zero-clearance inserts for my table saw, sandpaper, extra glue and tape, small pieces of hardwood with each species having its own container, et cetera. As a side note I just Googled whether to end a sentence that ends with "etc." with a second period. The answer is no. Also, this is the first time ever in my entire life that I have actually spelled out "et cetera". Just thought you should know. I pack fixture orders in my office and have some pre-bagged items such as Vertical Presses, clamp pads, hardware as well as instructions, shipping labels and packing tape. Then there are all the miscellaneous office supplies — staples, notepads, any drafting stuff that will fit... you get the picture. If you decide to build something similar to this cabinet or even if you just buy bins like these then you should stick with one brand because they're made to stack. Stacking doesn't matter if you build a cabinet but the reason they stack matters. Different brands differ in width so when you do build this cabinet it will probably only hold one brand and not any others. At least I wouldn't depend on it. One thing I found is that the Sterilite brand is wide enough for standard 9" x 11" sandpaper sheets to lay flat. The other brand I have isn't wide enough. If sandpaper is stored in those bins the edges curl up the inside of the bin. What I like best is that they have lids that lock on. I am really tired of continually dusting things that I need to keep but don't use all the time. Whenever I turn on my table saw everything in the shop gets covered with sawdust. The enclosed units keep things clean and are a lot easier to clean up. They aren't sealed so they won't offer rust protection in a humid environment but they will keep out sawdust. While I really like these bins what I don't like is that I had them in stacks which meant un-stacking them to get at the bin I needed. Where this first became annoying was when I used my router table. I had several bins stacked on a shelf under the table. To do even the simplest thing I had to open multiple bins multiple times.
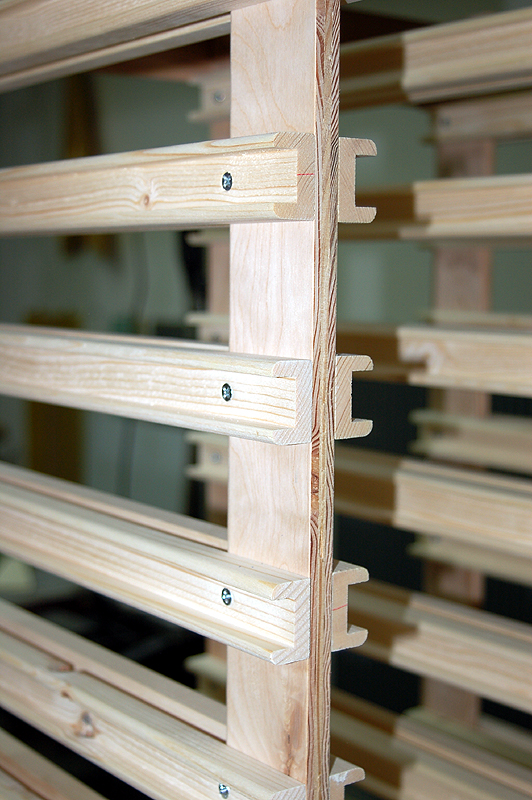
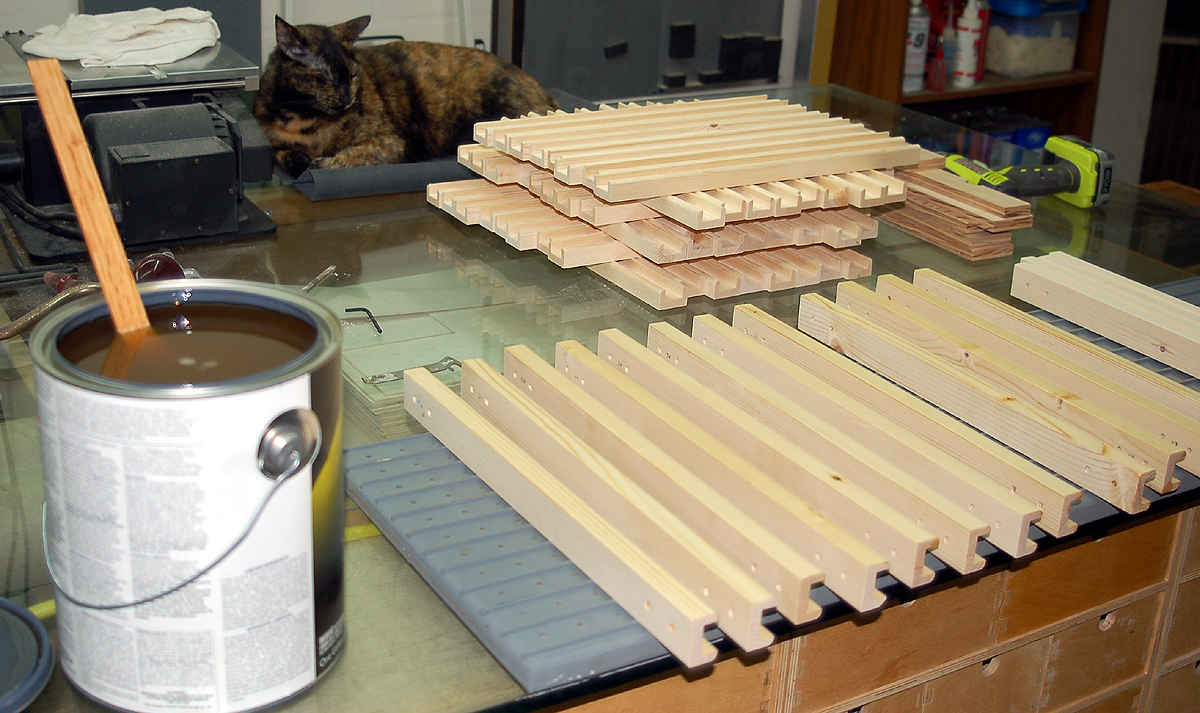
These bins can actually hold a lot of weight but that causes bottoms sag a lot which will probably cause them to crack over time and it means they have to be spaced farther apart vertically in a cabinet so they have space between them. And let's be honest — nobody thinks saggy bottoms look good. Don't fill these bins to the brim with nuts and bolts if you're going to hang them from rails. In the interest of maximum consolidation I made a rule to never put unreasonable weight into a bin so I could get more of them into less space. Because the idea worked with my router table I got the bright idea to make an entire cabinet (two actually). The first one I built is shown here. It is approximately the same height as other furniture in my office and it has a real counter top. It actually came out 1" too high because I had to adapt things while I was building such as put in additional support for the castors and I forgot to take that away someplace else. So I screwed up but I still love this thing. It's one of the most useful things I've ever built. The cost of the cabinet itself is one or two steps up from dirt cheap. Compared to solid hardwood furniture the cost is dirt cheap. Whenever I'm trying to solve a problem I tend to come up with the most complex solution first. Then I start the project and at exactly the time that I'm far enough along that it would be very wasteful to start over I realize I could have achieved the same thing much more simply. You might be thinking that I'm mentioning that because it applies here. And you might be right. Actually, you are right. I'd give you one of the delicious cookies I'm eating right now if you were here. Before I tell you how I complicated things I'll tell you my original intent. I was not pretending that I was building a piece of classically beautiful furniture. Plastic and classic don't belong in the same room, much less the same sentence. I was looking for functionality and competent craftsmanship. Solid cherry cabinets are beautiful but not what I needed. The requirement was to get it built and put into service as quickly as possible to get reclaim some counter-space and then get back to my real work. SimplicitySo what I could have done and would have done if I'd thought of it soon enough is just cut out sticks that the bins sit on top of instead of making grooved rails for the bins to slide into. I don't know why I was thinking that's what needed to be done but I spent a lot of time cutting boards into strips, routing them and then sanding each one by hand. Sticks would have been much simpler. While making adjustments I had to route each of the rails two more times. Lots of hours are in those rails. Either way the rails would begin life as pine boards. You can buy pre-cut sticks but that would increase the price of the wood several-fold.
|
|
|
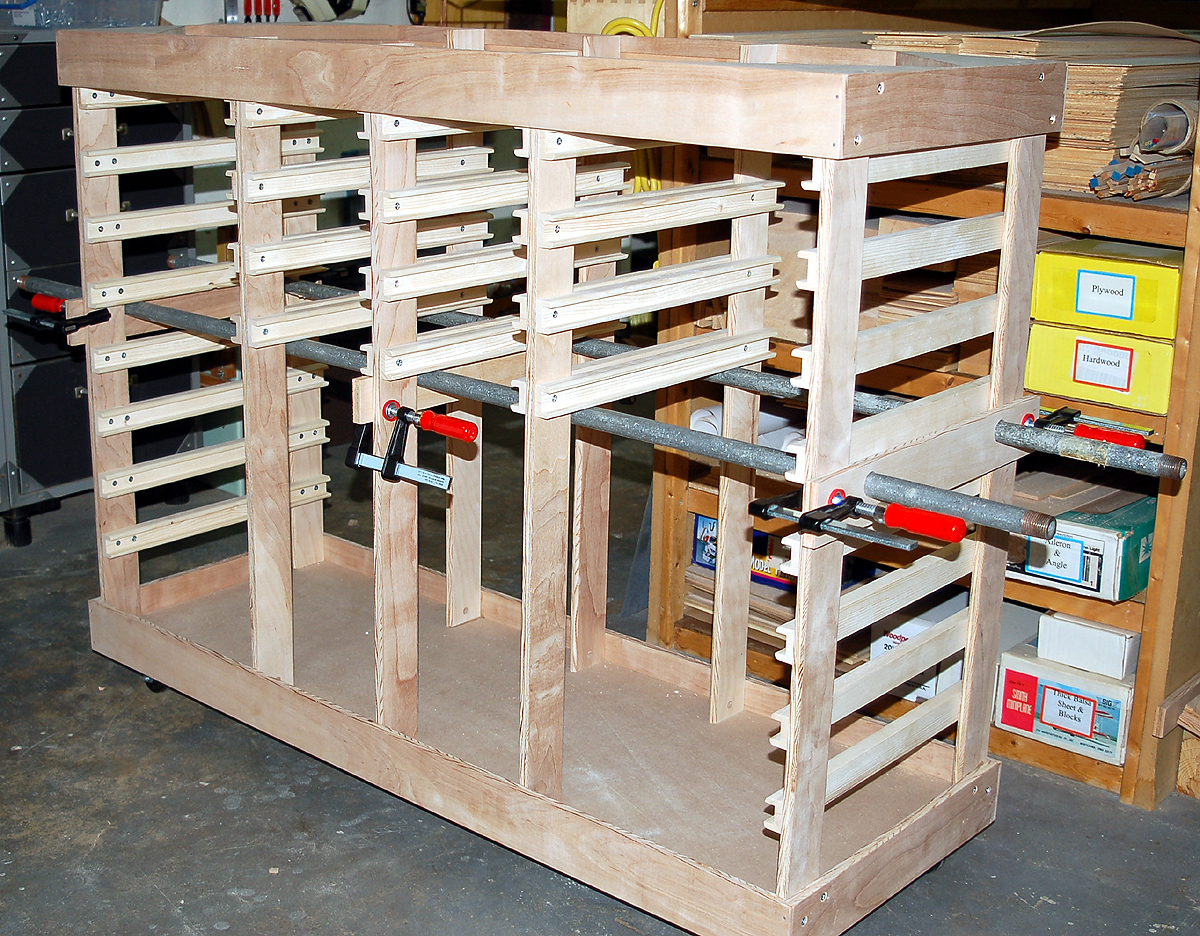
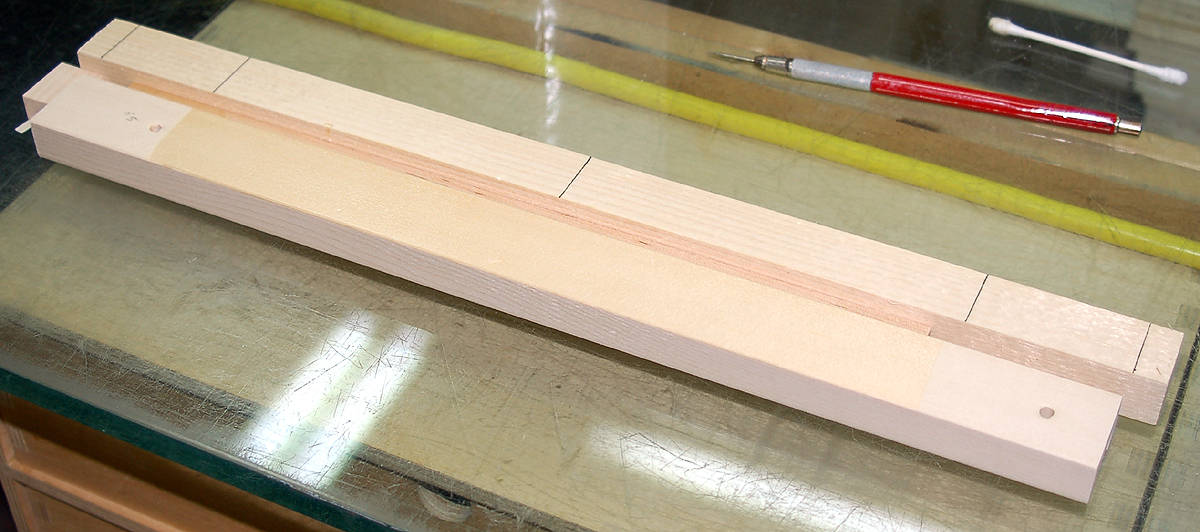
Building the CabinetOne thing I didn't like about the original implementation of the idea with my router cabinet is that I used 3/4" medium density fiberboard. The MDF wasn't thick enough to put the bins side-by-side. I had to stagger them vertically so that there was material left to keep the board in one piece. To have the bins line up horizontally would require the boards to be doubled to 1-1/2" thick which would have made a very heavy cabinet. That approach would have been simpler and faster but when I said I wasn't looking for beauty I wasn't looking for butt-ugly either. The project took longer because I was working things out as I went along and then had to go back and do some things more than once. For example, I routed the rails three times each and there are a lot of them — two per bin times thirty-six bin locations for a total of seventy-two rails. The fact is I made almost one hundred fifty rails because I knew I was making more than one cabinet and some of the wood was pretty badly bent (worse than warped). Then I decided to only pre-finish areas I wouldn't be able to get to after the cabinet was assembled. So I glued it all up and used thinned polyurethane as a wipe on finish. Each coat took 2-3 hours to apply. I didn't even bother trying to smooth the finish by sanding and rubbing afterward. If you actually touch the cabinet it still has every bit of dust in it that went on with the finish. Again, stick-rails instead of routed rails would be a lot easier. The skirts are cut from 1/2" cabinet plywood. Both the top and bottom skirts have half-lap joints at the corners. The lower skirt has a dado to receive a 1/2" MDF floor. Both skirts were glued up using yellow carpenter's glue. The uprights are also 1/2" cabinet plywood and are epoxied to the floor and lower skirt. I drilled the uprights near the top and bottom to glue in dowels to receive wood screw reinforcements. The dowels hold a wood screw with far more security than screwing into the edge of plywood. The pair of uprights at both ends of the cabinet (four in total) were accurately measured and marked to mount the bin rails before the uprights were glued to the floor. After all the uprights were glued to the floor assembly the completed upper skirt was glued to the uprights. Triangular gussets from 3/4" MDF reinforce the top skirt and provide a mount for the counter top. Triangular gussets from 1/2" MDF are glued under the floor for reinforced castor mounts. The actual reason I added them was because the castor mounting screws were too long and would have gone all the way through the floor.
|
|
|
|
|
No, I'm not going to sell these either as kits or assembled. There
is no way I could sell them for a price that would be worth it. |
|
|
|
|
|
|
|
|
|
Copyright © 2011 Paul K. Johnson
|
|