Wing Description
 As you are reading through this article, keep in mind that I have taken the
construction to the extreme for my
Rustik
project. As you are reading through this article, keep in mind that I have taken the
construction to the extreme for my
Rustik
project.
The point is the details of how to prepare
the parts and turn them into a straight wing — not how to go overboard in
embellishments (but this project is a great example of that too).
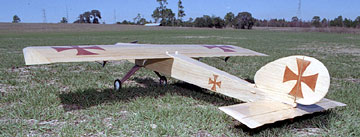
Rustik is a scratch-built aircraft meaning it is being built without plans.
The wing planform is fairly standard. The wing span will be roughly
50" and the chord is 12" giving the wing 600 square inches of area and
approximately a 4:1
aspect ratio.
I plotted a "real"
airfoil and promptly forgot
which one I chose. All I remember is that it is a 15% symmetrical
airfoil. I believe it is a NACA 0015.
The wing will be built in one piece.
All strip wood and sheeting is one piece running the full span.
Shear Webs will be used
along the entire span. The wing is fully
sheeted and will have built up
ailerons
rather than tapered aileron stock which is heavier and more flexible.
I used a lot of closely spaced
ribs (23 in total). On a D-tube wing I
normally space the ribs slightly farther apart: 2-1/4" to 2-3/4".
Controls
Four
servos will be used to control
flaps and
ailerons. They will be
mixed using a
computer transmitter to allow
flaperons,
crow-mixing, etc. The servos will be mounted so that the
servo arms and
pushrods
exit the bottom of the wing.
The entire wing will receive a natural finish
beginning with lightweight (0.5 to 0.75 ounce/square yard)
fiberglass cloth.
It will then be painted with clear polyurethane.
Reality Check
Some of the decisions I made for aesthetic
purposes carry a weight penalty. This wing could be closely the same
aerodynamically, but lighter than what is presented here.
-
D-Tube
construction instead of fully sheeted.
- Fewer ribs spaced further apart.
- No inlays.
- Built-up wing tips instead of solid wing
tips.
- Cover with plastic film instead of fiberglass and resin. Note
that my fiberglassing technique probably weighs the same or less than film
covering. Adding primer and paint would add more weight, however.
Additionally, the wing could be built having one aileron per panel instead of a flap and
an aileron. Servo weight is cut in half as well as removing four
servo extensions (two in the wing and two from the receiver), hatches,
hardware, etc.
Overall, the several ounces of potential weight savings will be
noticeable in flight.
|

